Making a guitar body
After drying, the wood of which we intend to build a guitar body ( I prefer alder ) , move on to merge 2 or 3 parts boards that are pre cut to size . So if you are working in a copy of a Fender Stratocaster , than be glued parts have dimensions of 500 x 340 x 50 mm .
The boards connect to the reverse -facing sides are cut , the reason that the compounds do not distort . Sides to be bonded must be perfect leveled the lathe . At trial merger without sticking , when pres should not be seen on the other side of the slot . Suggest prepared timber, ready for gluing mark , and squeeze clamps without adhesive . so we'll see any errors in the planing and eliminate disadvantage. If all is well, then top edges of both sides of wood glue (I suggest Titebond glue ) , thin plastic spatula very slim , because the glue is already non pressure material and the excess does not go out. The best way is to wait 3-5 minutes to soak the wood glue , and then squeeze as much strong constraints . Ensure to squeeze a piece radially diluting . Keep it glued at least 24 hours in a warm room , an airy but certainly not in the sun .
After drying glue off our discipline , and so stuck a piece ready for further processing . It is important to follow the procedure . The biggest misconception is young and inexperienced builders to cut out the body first right at the planned dimensions , Why ? , Because the possible errors in the grooves of the neck , pickups and bridge , in the case of multiple errors can not fix .
Thus, the sequence denote the exact measurements and a sketch of a guitar according to the draft or template . After that first it is important to position the slot neck (neck pocket ) . Mark the location exactly where it will be positioned neck . When Stratocaster is to sketch like this:
So the neck that you first created and its dimensions ,gnow place on boards which will be neck pocket . When the neck pocket is perfect for scoring , and therefore need a milling machine . , The neck should be adjusted , screw and fasten it will be when the guitar is finished . This will create the conditions for accurate positioning Bridge , magnets and other things that go on the body .
Bridge position ourselves to advance the desired focusing scale , so that the seat where the wires lie exactly on a distance scale measured from the NUT 's headquarters to the wire . By this measure it is easy to determine the place where the bridge will be located . So important is the direction and length scales . It is important to determine exactly what type of Bridge will be installed , or the best that we have at hand .
It is particularly important that the neck bridge positions . This will be determined by the 1:06 guitar tuner project plus stabilizer thin nylon thread ( one for fishing ) . Following the edge of the guitar neck , project plus stabilizer thread and thin nails is knocked into the body of the guitar where the bridge will be .
According to the Bridge position , put the template plate with electronics ( pickguard ) or best original panel that will be installed . The holes on the board and mark pen drill bit 2 mm , depth 8 mm . At the same time mark the magnets while the board to the board ..
Only when everything is checked, the first drill all the necessary holes for magnets , sensors and OUT jack . Do nothing more to shape the board should remain just drawn and well visible on the board .
Only when everything is milled , neck and attached plate with electronics , free format layout boards . First, the upper side plan fine , so that the surface is flat and smooth .
It is important to note that the neck attached to the body is planed the upper hand to be raised by about 5-6 mm above the body of the guitar , or for dept fretboard . The neck should be parallel with the body of the guitar.
After fixing critical parts ( neck , bridge and magnets ) , guitar body can be cut into the final shape . The cuts are about 3 mm beyond measure due to finish . Thinning of the body to measure ( approximately 46 mm ) should be done on both sides . After milling slots ( holes for magnets and switch and output jack ) which are hidden under the board , moves to gradually finish body guitars .
First abrasive paper 150 ( best turnaround eccentric sander ) , and then paper No. 250 In the absence of such a grinder , it can be done manually , sandpaper and " puck "
but the procedure is laborious and time-consuming . The intention is only to the body equally sanded on both sides , and evenly and that there are no holes , cuts or bulges . After sanding , the body should be smooth as glass. On such a smooth body should apply the basic nitro lacquer to dry grinding . If you want the body of the guitar nuanced in another color , it should be clean , dry , apply a stain body from dust . Stains on the nature of the material that is absorbed into the wood and gives beautiful shades of color you choose . The visible contours and texture of wood . Stains should be applied with a cloth , sponge , light but continuous movements . It should be applied so as not to see the transitions . If you want more intense shades , is applied in multiple layers at an interval of 15 minutes .
Once the wet colour must not be more sanding . If we want to remain only on the body contours of the texture of wood , then repeated applied
sand paper No. 400 Then it will be only the contours of the wood there is a di stain penetrated the deepest .
So that is sanded ,cover body impregnate transparent nitro lacquer fundamental for dry sanding . The paint thinned with nitro thinner at a ratio of 1 : 1
We apply a thin brush strokes faster . It is important that the ambient temperature is below 10 degrees . Dried for approximately 1 hour . Thereafter abrasive dry sandpaper No. 400 Best grinder , but it can also manually . Here is where a good proportion bije.li abrasive powder like flour . Delete " dust " , and repeat the operation at least three times . After that, the surface is smooth as glass .
The body of the guitar is ready for finishing . Finish can be made in three basic ways :
1.lacking some of topcoats ( nitro cellulose , polyurethane or water-based varnish ) .
Second Shellack finish is a special procedure that will be described here .
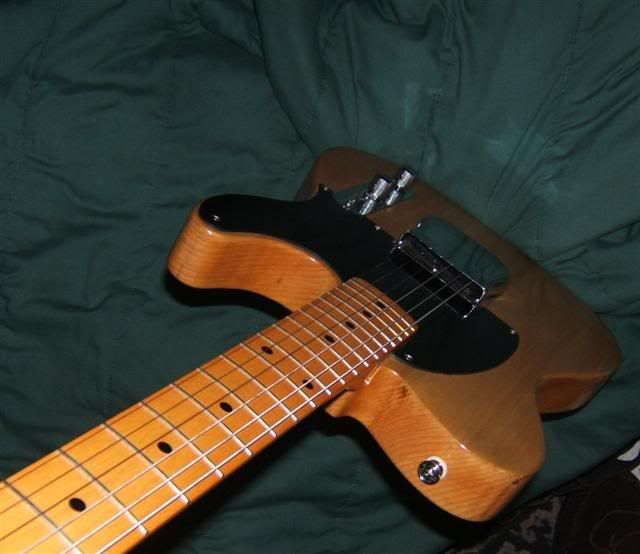
| Telecaster model |
The boards connect to the reverse -facing sides are cut , the reason that the compounds do not distort . Sides to be bonded must be perfect leveled the lathe . At trial merger without sticking , when pres should not be seen on the other side of the slot . Suggest prepared timber, ready for gluing mark , and squeeze clamps without adhesive . so we'll see any errors in the planing and eliminate disadvantage. If all is well, then top edges of both sides of wood glue (I suggest Titebond glue ) , thin plastic spatula very slim , because the glue is already non pressure material and the excess does not go out. The best way is to wait 3-5 minutes to soak the wood glue , and then squeeze as much strong constraints . Ensure to squeeze a piece radially diluting . Keep it glued at least 24 hours in a warm room , an airy but certainly not in the sun .
After drying glue off our discipline , and so stuck a piece ready for further processing . It is important to follow the procedure . The biggest misconception is young and inexperienced builders to cut out the body first right at the planned dimensions , Why ? , Because the possible errors in the grooves of the neck , pickups and bridge , in the case of multiple errors can not fix .
Thus, the sequence denote the exact measurements and a sketch of a guitar according to the draft or template . After that first it is important to position the slot neck (neck pocket ) . Mark the location exactly where it will be positioned neck . When Stratocaster is to sketch like this:
 |
| Stratocaster template and plane |
So the neck that you first created and its dimensions ,gnow place on boards which will be neck pocket . When the neck pocket is perfect for scoring , and therefore need a milling machine . , The neck should be adjusted , screw and fasten it will be when the guitar is finished . This will create the conditions for accurate positioning Bridge , magnets and other things that go on the body .
Bridge position ourselves to advance the desired focusing scale , so that the seat where the wires lie exactly on a distance scale measured from the NUT 's headquarters to the wire . By this measure it is easy to determine the place where the bridge will be located . So important is the direction and length scales . It is important to determine exactly what type of Bridge will be installed , or the best that we have at hand .
It is particularly important that the neck bridge positions . This will be determined by the 1:06 guitar tuner project plus stabilizer thin nylon thread ( one for fishing ) . Following the edge of the guitar neck , project plus stabilizer thread and thin nails is knocked into the body of the guitar where the bridge will be .
According to the Bridge position , put the template plate with electronics ( pickguard ) or best original panel that will be installed . The holes on the board and mark pen drill bit 2 mm , depth 8 mm . At the same time mark the magnets while the board to the board ..
Only when everything is checked, the first drill all the necessary holes for magnets , sensors and OUT jack . Do nothing more to shape the board should remain just drawn and well visible on the board .
Only when everything is milled , neck and attached plate with electronics , free format layout boards . First, the upper side plan fine , so that the surface is flat and smooth .
It is important to note that the neck attached to the body is planed the upper hand to be raised by about 5-6 mm above the body of the guitar , or for dept fretboard . The neck should be parallel with the body of the guitar.
After fixing critical parts ( neck , bridge and magnets ) , guitar body can be cut into the final shape . The cuts are about 3 mm beyond measure due to finish . Thinning of the body to measure ( approximately 46 mm ) should be done on both sides . After milling slots ( holes for magnets and switch and output jack ) which are hidden under the board , moves to gradually finish body guitars .
First abrasive paper 150 ( best turnaround eccentric sander ) , and then paper No. 250 In the absence of such a grinder , it can be done manually , sandpaper and " puck "
but the procedure is laborious and time-consuming . The intention is only to the body equally sanded on both sides , and evenly and that there are no holes , cuts or bulges . After sanding , the body should be smooth as glass. On such a smooth body should apply the basic nitro lacquer to dry grinding . If you want the body of the guitar nuanced in another color , it should be clean , dry , apply a stain body from dust . Stains on the nature of the material that is absorbed into the wood and gives beautiful shades of color you choose . The visible contours and texture of wood . Stains should be applied with a cloth , sponge , light but continuous movements . It should be applied so as not to see the transitions . If you want more intense shades , is applied in multiple layers at an interval of 15 minutes .
Once the wet colour must not be more sanding . If we want to remain only on the body contours of the texture of wood , then repeated applied
sand paper No. 400 Then it will be only the contours of the wood there is a di stain penetrated the deepest .
So that is sanded ,cover body impregnate transparent nitro lacquer fundamental for dry sanding . The paint thinned with nitro thinner at a ratio of 1 : 1
We apply a thin brush strokes faster . It is important that the ambient temperature is below 10 degrees . Dried for approximately 1 hour . Thereafter abrasive dry sandpaper No. 400 Best grinder , but it can also manually . Here is where a good proportion bije.li abrasive powder like flour . Delete " dust " , and repeat the operation at least three times . After that, the surface is smooth as glass .
 |
| Telecaster model |
The body of the guitar is ready for finishing . Finish can be made in three basic ways :
1.lacking some of topcoats ( nitro cellulose , polyurethane or water-based varnish ) .
Second Shellack finish is a special procedure that will be described here .


Primjedbe
Objavi komentar